User management
Manage HUB user accounts, assign roles, and control access to system features and business data to maintain security and accountability
User management is an essential feature in the Chargebackhit HUB and it supports several important goals:
- Control access
Determine who has access to the system and their permission level. - Improve security
Restrict the number of people who can access sensitive information. - Maintain accountability
Keep track of who makes changes to the system to identify potential issues or problems. - Streamline communication
Assign different roles and responsibilities to different users, such as administrator, analyst, and alert manager, to improve collaboration and communication.
User management in the Chargebackhit HUB ensures efficient, secure, and effective system usage by empowering administrators to establish roles, define permissions, and access user information. This provides proficient user management within a chargeback alert system, guaranteeing security and operational efficiency.
| Type | Description |
|---|---|
| Roles | Predefined user roles, including administrator, analyst, alert manager, and others, dictate the level of access and permissions granted to each user. |
| Permissions | Specific actions that users can perform within the system. |
| User information | Individual user information, such as email, creation date of the account, status, and roles. |
Add user
To add a user
- Go to your Chargebackhit HUB account > User management.
- Select Add user.
- Enter the email address of the person you want to add to the HUB.
- Select the checkboxes from the predefined list to define the account type.
- Select checkboxes to assign one or more of the following roles to the user:
- Admin - manage users and MIDs, respond to alerts, and update account settings
- Alert manager - view alert responses
- Analyst - view analytics data
- Manager - manage users and MIDs, respond to alerts
- Select Add to save the new user.
If a user is already blocked when you add them to the system, you receive the following error:
"This user is blocked. Please contact support team for more information."
"This user is blocked. Please contact support team for more information."
Manage user table
You can manage table by using the available options, such as:
- Actions
Use buttons to allow or restrict user access. They become active after selecting the checkbox next to a specific user.- Block
Restrict access for the selected user. - Unblock
Restore access for the selected user.
- Block
- User details
Select the arrow to view user information. Hover over the email address and click to copy it. - Group management
Manage groups from the user information page. - Settings
Adjust the row style and height for comfortable viewing. Customize displayed columns if needed.
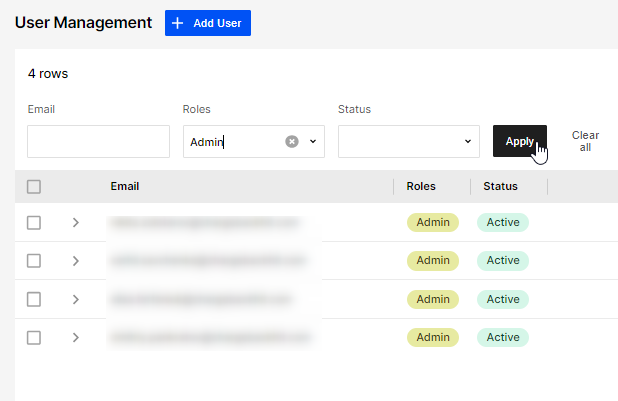
Customize table view
Apply filters to customize the table layout:
- Email
Find specific users using their email addresses. - Roles
Sort users based on their assigned roles within the system. - Status
Filter users based on the status of their account within the system.
Looking for help? Contact us
Stay informed with Changelog